Share "How to Refinish a Bathtub"
Whether your bathtub shows just a little wear, some significant scratches, or bad staining, refinishing can renew the tub and give it new life for a fraction of the cost of a full replacement. Furthermore, refinishing a tub can be a much easier project than many homeowners realize, making it an effective and efficient option for bathroom upgrades.
About Bathtub Refinishing
Refinishing a bathtub can seem overwhelming, but it is actually a very rewarding project to accomplish. Also called resurfacing, reglazing, or recoating, this process is a cosmetic update to the tub and can effectively treat discoloration and rust stains as well as small cracks, chips, and scratches. It is important to note, however, that refinishing will not resolve stronger problems such as leaks or deep defects. If only simple surface repairs are needed, however, refinishing can be the perfect solution and may take as little as a weekend to complete.
Easy Steps to Refinish a Bathtub
Before you begin, it is best to thoroughly inspect the tub and be sure refinishing is the best option. When you’re ready to start…
- Clear out the bathroom of all excess items, including decorative accents, window coverings, hanging towels, and accessories. This will prevent these items from potential overspray or chemical odors, and will provide more space for working and ventilation.
- Remove the tub’s hardware and fixtures, and remove caulk if possible. This allows better access to the entire surface to be refinished. This is also a great time to change to new or upgraded hardware for a completely new look.
- Clean the tub thoroughly with a powerful degreaser. This will remove all surface contamination and debris that might affect how the different reglazing compounds interact with the tub and bond to the finish.
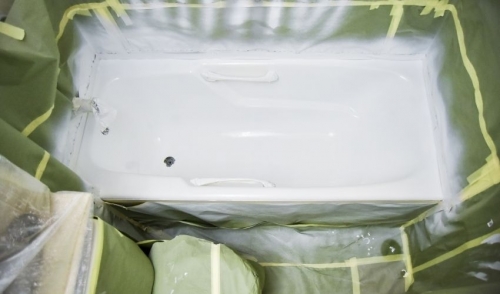
- Position drop cloths, tarps, paper, and other protective coverings over other fixtures and features in the bathroom. This will keep dust, debris, and spillage to a minimum and allow for easier cleanup after the project is complete.
- Use epoxy filler to repair any chips or deep scratches on the tub. Follow the compound’s instructions carefully, and use the appropriate material for your tub’s construction. Scrape excess filler away with a putty knife before it dries to minimize sanding work, but take care not to introduce new scratches to the surrounding finish.
- Sand away rough spots from the repaired areas using sandpaper or an orbital sander. They should be very smooth to the touch, without any discernible gaps between the filled space and the surrounding finish. Use different grits of sandpaper to smooth out the roughness as needed.
- Vacuum out any sanded debris and resand the entire tub once more. This will help the new finish to bond properly to the tub’s full surface for a smooth result. Ideally, sand and clean the tub three times to be sure it is all properly prepared for refinishing.
- Repaint the tub to its new or refreshed color with epoxy coating, using a primer first if necessary. Choose coloring that coordinates with the bathroom or will be neutral for future design changes. Use 2-3 coats to provide a good color and firm foundation for the finish, allowing the tub to dry at least 15-20 minutes between each coat. In very humid areas, longer drying periods may be necessary.
- Carefully buff the dried tub if needed. This will depend on the finish formula and the top coating, and isn’t always necessary but will provide a smooth sheen and professional look to the project.
- Allow the tub to cure for 48-72 hours, keeping the bathroom well ventilated for at least the first 24 hours (longer if possible). Proper curing is essential so the new finish is strongly bonded and will not peel, chip, or smear when it is put to use.
- Reinstall all caulking and hardware on the tub, taking care to position it properly and evenly. Allow the tub to cure an addition 8-24 hours after this step so the bonding is complete and there will be no leaks or other problems when the tub is used again.
- Remove all remaining drop cloths and cleanup the work area, bringing back the bathroom accessories to restore the room to usable condition, and enjoy the newly refinished tub!
Tips for Refinishing a Bathtub
While refinishing a bathtub is not a difficult job, it is important not to overestimate your handyman skills before attempting this project. Judge the tub’s condition carefully, and be sure the job is worthwhile for your time, bathroom style, and budget. Always wear appropriate protective gear when working with epoxy and other chemicals, and ensure the bathroom has plenty of ventilation and airflow both for safety and to cure the tub properly. Be patient as the tub cures and don’t rush the process or the result will not look as professional or pristine, and be sure you have another bathroom available for the 3-5 days it may take to complete the job.
When you know how to refinish a bathtub, you can give your bathroom a completely new look and update its appearance in just a few days. Taking care with the project and paying attention to detail will ensure a superior finish and results you’ll be happy with for many years.